
Getting to know iServe
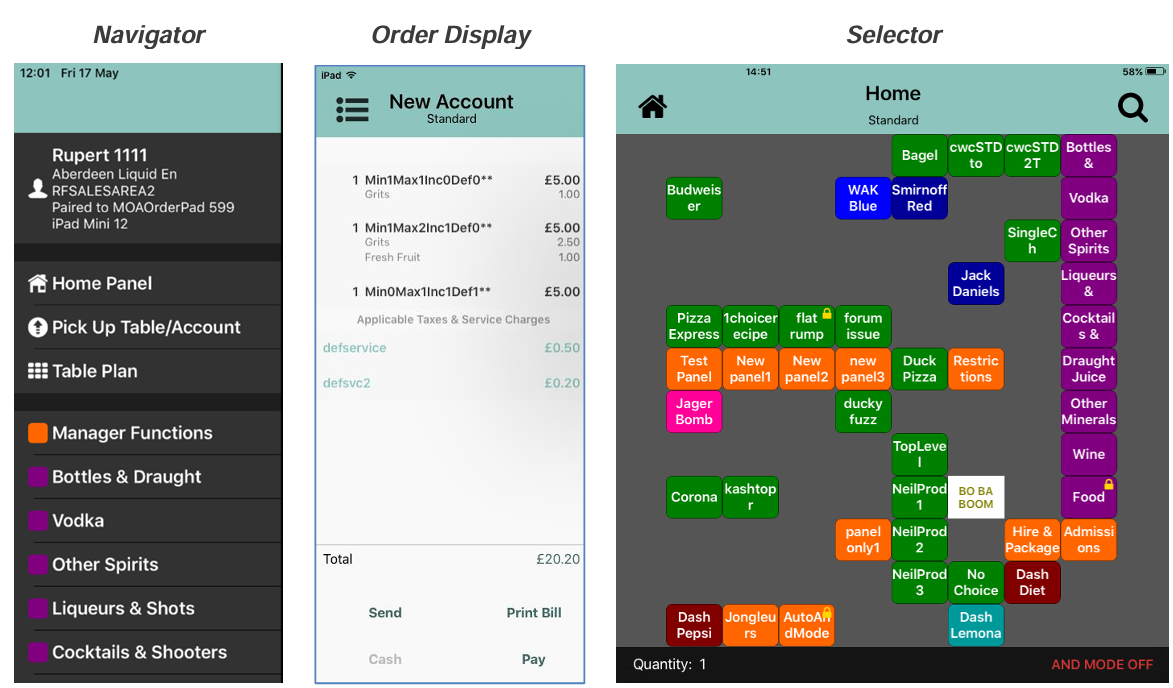
Once your device is paired and Aztec iServe is logged in, you can start processing transactions from your iOS device: The user instructions below refer to the following screens:
Selecting the  icon will also switch between the Navigator and the Order Display.
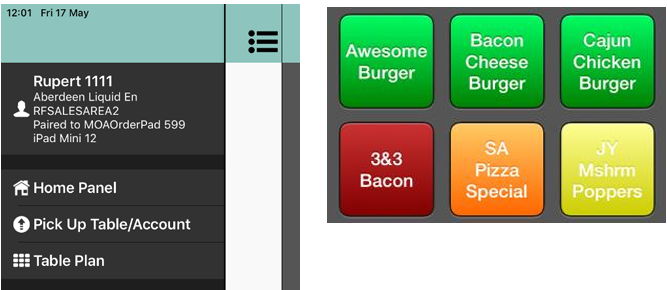
The top of the Navigator panel displays:
- User Name
- Site Name
- Sales Area
- MOA Order Pad Identifier
- Device identifier

You will be asked to swipe over the screen complete various operations:
Signing In/Out
Sign in using the four digit password you normally use to log into Aztec.
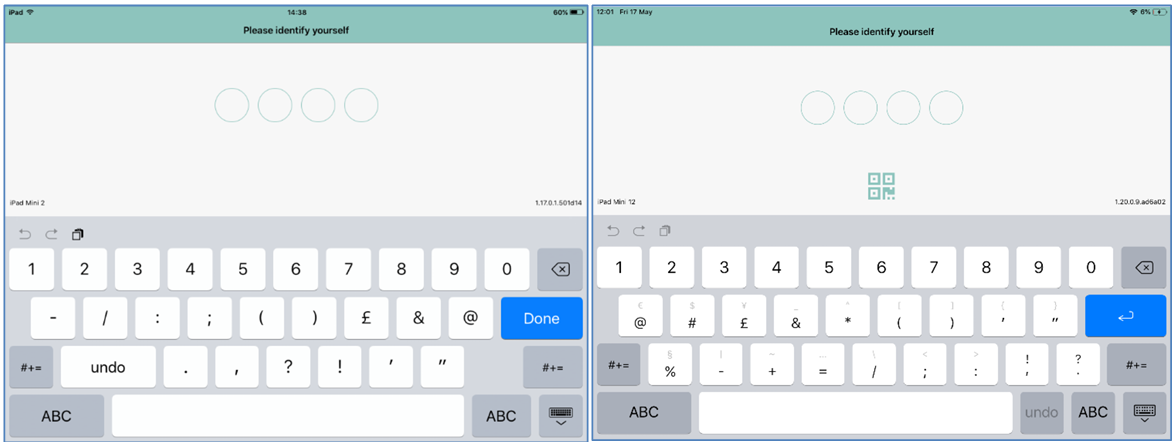
The iServe version number is displayed in the bottom right of this screen. If barcode login has been enabled in the iServe Config application, you can select the QR Code icon to initiate the camera.
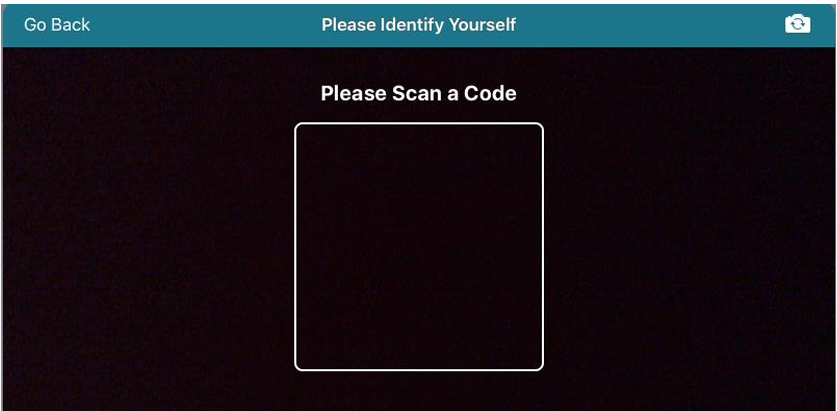
When you pass your staff ID barcode in front of the iPad camera it will log you into iServe. If your user ID barcode is not recognised, the following message is displayed.
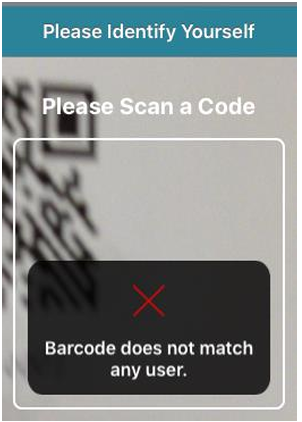
If the camera is disabled, you can go into the device settings and enable the camera or enter your ID code manually.
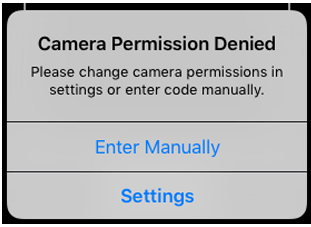
If you have guided access set up on site you will be unable to enable the camera.
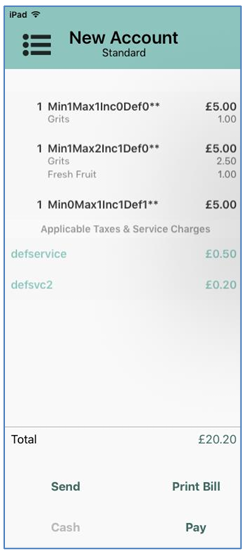
The order display screen will be displayed automatically if an active account exists on the system:
When signing into the iServe device a new blank account is opened automatically ready to ring up products for the customer.
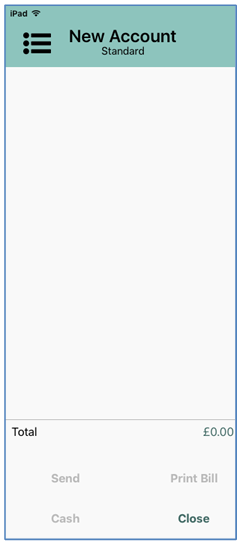
However, If a user has an account open on the POS terminal with products already added to the basket, after logging into iServe the same account will be open on the iServe device ready to continue the order.
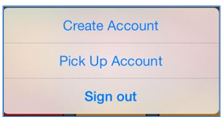
If no active account exists on the system and the Always Prompt for Table setting is enabled, users will be prompted to create a new account or pick up an existing account. If the user creates a new account, the app will default to the theme home panel.
If table workflow is being used, the table plan will be displayed at this point to allow a new table to be selected:
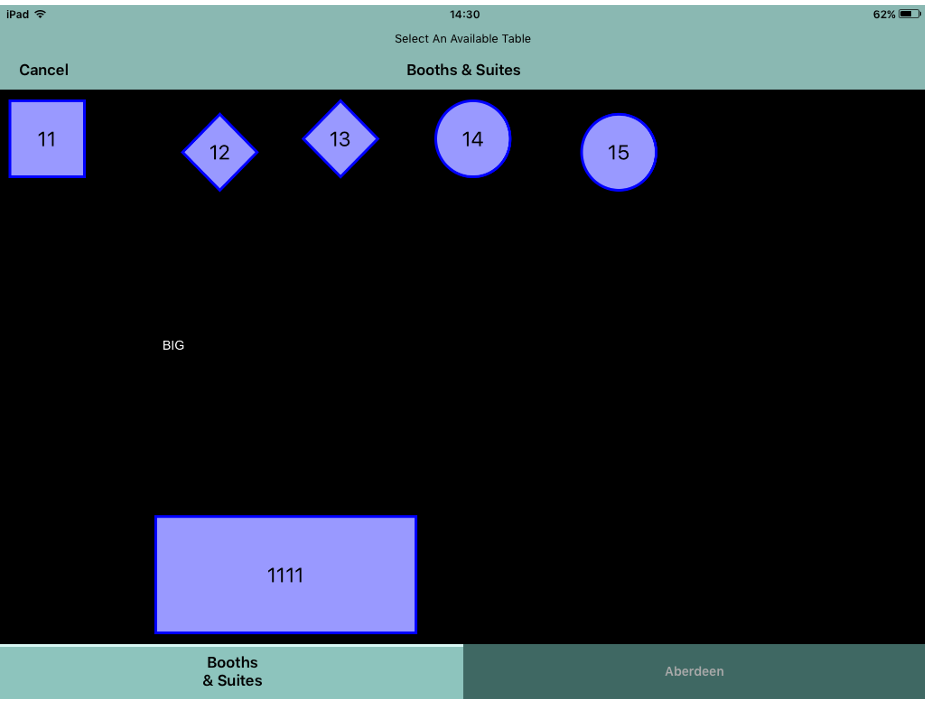
You can use pinch and zoom to display a more detailed view of the table plan. If more than one table plan is available, you can switch between them by selecting one of the tabs at the bottom of the window. The tab of active table plan matches the colour of the header.
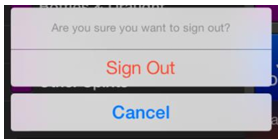
To sign out:
- Return to the Navigator screen.
- Tap on your User Name.
- Select Sign Out.
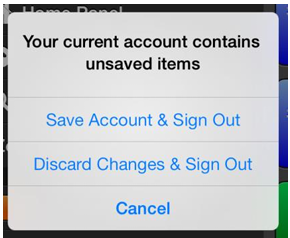
When signing out, the user is prompted to save or discard any unsaved present in the basket.
iServe Theme design
iServe can be configured to render product buttons from left to right or to adopt a panel design defined in Theme Modelling. This is configured in Aztec by assigning a theme to the iServe device. If an Aztec Theme is used, the iPad buttons can support up to two lines of text, subsequent lines are truncated.
iServe rendered buttons
When configured, iServe will render the theme on the selector panel by showing all available buttons from left to right in sequence with no gaps. When set up in this way the buttons are larger and easier to see, but do not match the layout of buttons on the PoS.
iServe Theme designed in Aztec Theme Modelling
When configured, the panel design displayed on the selector panel is designed in Theme Modelling and assigned to the device. This allows you to design an iServe panel with the same (or similar) layout as the site’s PoS terminals.
If text labels are included in the iPad theme, these will also be displayed on your iServe iPad device.
If the theme design selected is also used for the site’s PoS terminals, the theme won’t be displayed in exactly the same way as the PoS because some functions are handled differently in iServe compared with PoS terminals. Buttons with three lines of text are truncated so that only the first two lines are displayed. The first four columns of the theme are cropped from view and the following button types are not displayed:
- Discount buttons – these are already available via the Navigator on the Discount panel
- Payment methods – payment methods are displayed when Pay is selected in the iServe basket
- Portions buttons – users prompted to choose a portion size after picking a qualifying product
- Vouchering, Quick Send or Add Message buttons
Updating the Theme
The iServe theme can be updated automatically or manually by site managers.
The Updating Theme message is displayed in iServe whenever an update is in progress. iServe is temporarily disabled while updating the theme.
Updating the theme occurs when:
- The user has manually initiated a refresh of the theme and iServe is able to connect to ZCF on the site PC. If iServe is unable to connect, an Upgrade Failure message is displayed on-screen.
- iServe has detected that a change to the theme has been ‘Sent to POS’ on the Site PC. This update is automatic and required no user intervention.
You will need to refresh the theme if any of the following apply:
- Config settings have changed in theme modelling
- New products have been added to the theme
- Users have been removed from the theme
- Portions, choices and instructions have changed
- Buttons and panels have changed
Refreshing the Theme
iServe users can refresh the theme by selecting Update Theme from the Settings menu. Refreshing the theme will cause iServe to update the displayed theme if it can connect to ZCF on the site PC.
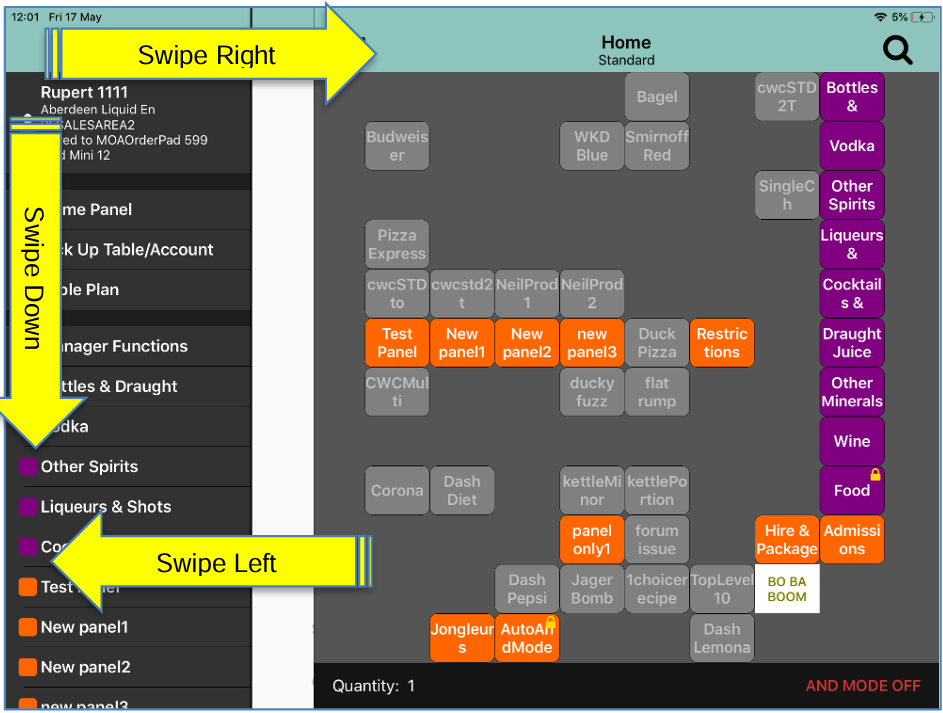
Navigating the panels
The default view in iServe displays the Order Display on the left and the Selector on the right.
Users can swipe right on the order display to display the Navigator screen. The Navigator screen provides a list of all the main panels from which you can drill down to any sub-panels.
When you select a panel that only contains sub panels, the selected sub panel is displayed in the same format.
When you select a panel that contains sub panels and products, the mixed contents are displayed as product buttons.
Select a panel from the Selector and this panel will display in the Selector.
Low Wi-Fi Signal Strength

When you are in an area with low signal strength, we recommend you move into an area with more than one bar before pressing the save button.
This will ensure the data is sent to Aztec reliably.
Problems you may encounter when using Aztec iServe in low signal areas.
If you are experiencing the title bar turning red you will usually be in an area that has low or no Wi-Fi strength. The iOS device may report a one bar signal, but in fact the application is unable to get a successful response from Aztec. In this instance, Aztec iServe will report that it is offline.
To rectify, you should move to an area with a stronger Wi-Fi signal. In tests at Zonal we have witnessed full reliability with two out of three bars.
Aztec iServe will take up to 10 seconds when signal drops to report being offline.
If the device itself believes it has lost Wi-Fi, Aztec iServe will report this as being offline immediately.
If a send on Aztec iServe is sent at the point where Wi-Fi has just been lost, there is a small chance that a send was successful, but the device did not receive a successful response. In this scenario it is possible the device will display a message warning the user that ‘The Account has been changed by another device’.
If this error is displayed, the user should pick up the account they were trying to update or refresh the basket when back online. In most cases the items that had been attempted to ring up will be in the account. In rare occasions, items will need to be entered again.